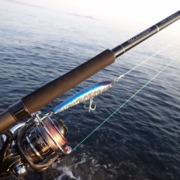
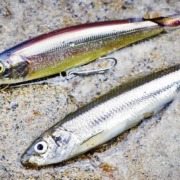
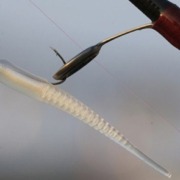
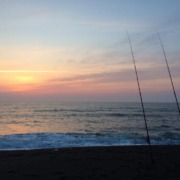
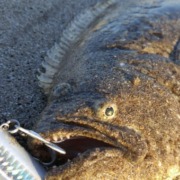
If you want to target flatfish with surf lures, understanding the currents is essential

When targeting flatfish with surf lures, most anglers say that the best timing is from the first ebb tide to just before the high tide, or from the first ebb tide to just before the high tide, and it is said to be icing on the cake if this time coincides with the sunrise or sunset in the morning or evening.

In my personal experience, the high tide period produced the worst fishing, the mid tide period the best, and the neap tide the next best. However, the differences in fishing conditions between high and low tide were difficult to discern clearly.

I had been wondering why this difference existed, but I had not been able to find a clear answer. Then, I found a vague answer in a Japanese paper I recently discovered.

This document was published in 1998, so it is quite old, but since it is unlikely that the habits of flounder have changed much since then, I will briefly introduce the contents of the document.

The original title is  “Analysis of coastal behavior of flounder using biotelemetry” and a link is provided for your reference.

One of the things I always emphasize in my writing, as someone who enjoys long-distance fishing and surf lure fishing more than the float fishing I have been doing for a long time,  is that even long-distance fishermen need to have a basic understanding of currents .

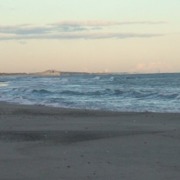
However, many people only understand the high and low tides, and there is a lack of effort to understand the boundary points of the tides called tidal marks or other underwater topography caused by waves. I would like to emphasize once again that the difference in being able to read these changes in the sea and not is directly related to the difference in tides.

Returning to the main topic, biotelemetry, as mentioned in the literature, is a research method that investigates ecology by remotely measuring data on behavior, physiology, and environment by attaching small transmitters to living organisms.

This biotelemetry was attached to wild flounder caught by gillnet fishing and released five times. The results were announced. Although the reliability cannot be considered high due to the small number of flounder used in the experiment, I think that the research results are still meaningful in their own way.

The water depths and weights and lengths of the flounders released from the 1st to the 5th time are as follows.

1st time: Depth 400m, Weight 1.5kg, Length 52.4cm

2nd time: Depth 70m, Weight 1.2kg, Length 48.9cm

3rd time: Depth 400m, Weight 1.0kg, Length 46.2cm

4 times: Depth 400m, Weight 1.1kg, Length 47.6m

5 times: Depth 400m, Weight 1.6kg, Length 53.5cm

And the area where the release was carried out was Sagami Bay, not far from Tokyo, and the migration route of the flounder released from the first to the fifth time is as follows.


1st discharge

2nd discharge

3rd discharge

4th discharge

5th discharge

Although the number of experiments and the number of flounders used in the experiment were small,  it was  confirmed that the movement of flounders occurred in the same direction as the current flow in this experiment . As reported by the author of this document, “the direction of movement of flounders and the direction of the current were the same.”


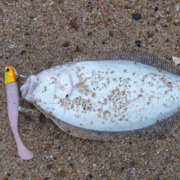
However,  it is understandable that the fishing season is not good for flatfish that are 45cm long and weigh over 1kg, as they are swept away by the current at a speed of about 21cm per second, and travel long distances with the current.

The report also shows that the flounder moved toward the nearby coast as soon as they were released.

Therefore, if you want to target flatfish with surf lures, you must first understand the behavior of flatfish that travels with the current, and then understand the environment and seabed topography that flatfish thrive in. This is what I want to emphasize once again. This will greatly help you catch flatfish.

Among them, the best place to catch fish was at the tidal point where the tides meet. I would like to conclude this article by saying that developing the ability to read the currents and changes of the sea is of great help.

Why do shock leaders use a lake that is 3 to 5 times larger than the PE?

It is said that the size of the shock leader, which is mainly used in lure fishing, is better to use nylon or carbon line that is 3 to 5 times the size of the synthetic line used. Let’s find out why.

Let’s skip the explanation of the PE line and just learn about the knot strength of the fiber, which is related to today’s topic.

If you look up knot strength on the Internet, you will see that it refers to the tensile breaking strength measured when fibers or threads are combined.

To explain this a little more easily with a picture, number 1 represents tensile strength, number 2 represents loop strength, and number 3 represents knot strength.

Fibers generally have the characteristic of being weak in the direction perpendicular to the axis. Among those used for fishing lines, polyester, which is the material for braiding, has the weakest characteristic. Nylon, which has excellent knot strength, is also used to make automobile airbags and stockings by taking advantage of its characteristic.

When expressing the strength of a fiber, the unit called g/d is used, which means the load when a weight is attached to a fiber of 1 denier and the fiber breaks.

Now, let’s take a look at the knot strength of PE, nylon, and carbon lines.

As you can see, the knot strength of the braided line is superior to that of nylon and carbon lines, but when knotted, the strength drops to 40%, so when the nylon line and the braided line are directly connected, the calculations show that the strengths of the two lines are roughly the same.

However, the most important point here is that polyester is 4 to 7 times stronger than nylon or carbon, and yarns made from polyester are on average 5 times stronger.

In other words, the strength of a No. 1 braided line is the same as that of a No. 5 nylon and carbon line. This is why, when using a shock leader, it’s recommended to use a leader size that’s three to five times the size of the main braided line.

But here’s a curious question. When I listen to experienced anglers, they all say that shock leaders tend to burst at the knot.

Why is that? Let’s find out now.

As mentioned before, the tensile strength of the composite is only 40%, that of nylon is 85%, and that of carbon is 70%.

This means that among the knotting methods used when connecting shock leaders, the knot made by only turning the main line, the braided line, without turning the leader, is stronger.

To explain what I mean, looking at the picture, in the case of the FG knot, the leader monoline remains as is, and the yarn is wound to make a knot.

Ultimately, the strength of the monoline remains unchanged, but the strength of the braided yarn at the knot site is reduced by 40%. In contrast, the brad knot, as you can see here, involves twisting both the braided yarn and the monoline to form the knot.

That is, the strength of the knot area is reduced to 40% for the main line, the braided line, and to 85% for the leader, the nylon line.

Therefore, it is said that the FG knot is stronger than the brad knot or similar tank knots.

So, what is the strength of each knot? Let’s look at the test results from a Japanese fishing line manufacturer, as you can see here.

One thing to note here is  that the knot strength, expressed as a percentage of the straight line strength of the knot, is based on the monoline used as the leader, not the braided yarn .

This can be seen in the results of an experiment conducted in 2017 by JGFA, the Japanese branch of IGFA, which manages world records for fish caught by fishing, which posted a video a few days ago. Since the story is getting long, I will introduce it next time.

As such, the knot strength of the fibers is weak in the perpendicular direction, so nets for catching fish generally use a knotless mesh.

To summarize the main point of today’s posting, the strength of the straight knot that connects the short leader refers to the ratio of the straight strength of the monoline, which is the leader, and using a number 3 to 5 times greater than that of the main line, the plywood, means that the tensile strength when pulled in a straight line is set to a similar value.

Surf Lure Points: How to Find and Attack Rip Currents

Rip currents are a constant presence in the news, causing fatalities at sea during the summer vacation season. However,  the locations where these dangerous rip currents occur are also essential surf lure fishing spots .

Places where rip currents are likely to occur include places with a long shallow coastline, places with artificial structures such as breakwaters nearby,  places with offshore breakwaters installed parallel to the coastline , and places where rocks, reefs, or artificial underwater structures are installed.


They also occur where rivers flow and along concave coastlines. These concave areas are where baitfish gather, and the spots described above also serve as good targets for other species.

First, to identify rip currents, you can look at the photo below, which shows dye sprinkled on the sea and the flow observed, to understand rip currents a little more easily.


In places where rip currents occur, the sand is eroded by the water flow, and as a result, the seabed becomes deeper than the surrounding area. This is where the topography changes, and flatfish gather, making it the first point considered in surf lures.

Here’s how to find where these rip currents occur:

Areas where rip currents occur are deeper than other areas, so white waves don’t form. However, for those with limited surf lure experience or fishing experience, it can be difficult to discern the difference. In such cases,  looking down from a slightly elevated position can help you spot them.

The second step is to find white waves perpendicular to the shoreline. The shallow water on either side of the rip current creates white waves, but the center of the current doesn’t.

The third point is in front of the point where gravel, seaweed, and other debris collect, which is where rip currents are likely to occur.

The fourth is where headlands, which are natural or man-made structures that jut out from the shore, are formed, and even if rip currents do not occur, the area around the headlands is a good spot.

When trying to find and attack a point where a rip current occurs, the first thing to be careful of is that you should not just aim for the center of the rip current.

Baitfish instinctively gather in areas where the seabed changes, so while there are certainly flatfish in the central area, it is better to target the boundary areas where rip currents occur.


The next thing to remember is that even if you find a rip current, you shouldn’t just fish that spot. As you explore the coastline, you’ll find multiple rip currents, and even within the same rip current, the magnitude of the current varies. Therefore, if you haven’t seen results after 30 minutes of fishing, it could be a sign of a change in location, or a problem with your gear or fishing method (I’ll post more about spot selection once I’ve finalized it). Therefore, it’s a good idea to double-check.

A Basic Understanding of Lure Fishing Match the Bait

According to information on the portal, “Match the Bait” ​​means that the more similar the size, shape, and color of the lure used is to the actual food of the fish, the higher the probability of it biting. This refers to a method of increasing the probability of catching a sea bass by figuring out what kind of food the sea bass is eating and using a lure similar to the food the fish is eating.

And sea bass eat a variety of prey depending on the season, and baitfish, which are abundant at each season, are usually the main prey.

In the spring, they eat earthworms, saury, and baby mullet, as well as other fish such as mackerel, saury, and saury, depending on the season.

The act of eating these specific baitfish is called a “bait pattern”, and the method of attacking when eating gizzard shad is called a “gizzard shad pattern”, the method of attacking when eating mackerel is called a “mackerel pattern”, and especially in the spring when most fish hatch, very small fish swim in schools, and the pattern of attacking these as food for sea bass and larger fish is called a “micro bait” pattern.


Knowing these bait patterns, you can 1. know where sea bass are caught well at the current time, and 2. learn strategies for catching sea bass (lure selection and action method). Starting today, we will learn about Match the bait over a total of 3 times.

In the first part of the series that will be published in the future, today we will learn about the basics of “Match the Bait”, then in the second part we will look at fishing methods according to individual “bait patterns”, and finally in the third part we will look at “micro bait patterns” and learn about fishing methods according to them.

To put it simply, Match the Bait means matching the lure to the food that the sea bass is currently eating. Not only sea bass, but also other fish-eaters such as flounder, yellowtail, mackerel, and cutlassfish eat a variety of foods, but they are picky eaters when the baitfish that are their prey move in schools, and the movements of small fish that occur when the fish eaters chase their prey are expressed as boiling.

Here, I will explain using sea bass as an example, but I think it would be good to think of the fish eaters mentioned above as the same.

However, I’d like to point out that matching the bait to the bait pattern isn’t necessarily the best solution. When fishing microbait patterns or feeding on very small squid, it’s difficult to match the lure, and even if you do, it’s difficult to match the hook size.


Match the bait, which operates the lure according to the bait pattern above, can be said to be based on the size, silhouette (overall outline), color, water depth, action and speed of the lure.

Adjust the size

Mullet is a representative prey item for sea bass. Mullet is born and grows in spring, and its size varies from a few centimeters in spring to around 10 centimeters in summer and fall. Consequently, sea bass’s response to catching mullet varies seasonally. Therefore, it’s best to use smaller lures in spring and larger ones as the season progresses.


Match the overall outline (silhouette)

The shapes of baitfish that become prey are all different, and in particular, the croaker has a thin and long shape, so it is better to use a long lure to match it, and during the spawning season for earthworms, it is better to use an even thinner lure.


Match the colors

Matching colors is a fundamental principle. Fish’s vision (do they recognize color?)  is largely determined by the intensity (shading) of a color. Therefore, even if the primary colors are prominent, using lures with a darker shade will yield better results.


Adjust the water depth

The area where baitfish are active is different, with some like sardines moving near the surface and others like kanari moving on the bottom, and the depth at which they are active can vary depending on the day and night, so it is best to use lures that match the depth at which the baitfish are active.

Match the lure’s action

Baitfish vary in body shape, resulting in different movements and resulting ripples. Thin-bodied species like the croaker have poor swimming ability, so their movements create small underwater ripples. Fish like the croaker or gizzard shad have larger bodies and create larger ripples, so it’s best to adjust your lure action accordingly.

Match the speed

In addition to matching the lure action, baitfish move at different speeds, and bass respond more easily to slow-moving bait at night than during the day, so varying the speed of movement of baitfish or day and night is helpful for fishing.

Types of soft lure (worm) tackle (various rigs)

In lure fishing, the term “00 rig” refers to equipment or tackle, just as the English word “rig” means.

When using live bait or fake bait (lure), it is important to make sure that the hook reaches the target fish, but since lures are things that fish may not think they can eat, it means operating the equipment so that the lure moves similarly to live bait.

In addition, in order to increase the probability of catching a fish, it is important to give it action, and especially when using a worm, it is important to choose the most suitable tackle, so we are currently conducting a lot of research and new tackle methods are continuously being developed.

Each rig is developed to suit the field environment and target fish species, so beginners may not have the ability to make their own rigs, so it is recommended that they first learn the rigs that have been developed and widely used.

Many of the rigging methods using worms originated in the United States, but some of the methods currently used domestically include the down shot rig developed in Japan, as well as those developed in Korea.

So, let’s take a look at some of the most commonly used methods among the various methods.


◉ Jighead rig

It is widely used when targeting rockfish, and is a method of using a jig head with a sinker attached to the hook so that even beginners can easily use it. The jig head rig mainly uses a retrieve motion, but it also tempts fish by adding action.

Especially when targeting sea bass or hairtail, the wind action is used to make the lure jump greatly from side to side, which can be seen as similar to the shark action in eging fishing.

The advantage of a jighead rig is that it is easy to handle because the worm and sinker are attached, but the disadvantage is that it is prone to snagging because the hook is exposed outside the worm.


◉ Texas rig

It is a method widely used in bass fishing, but it is also widely used when targeting rockfish that live in areas with heavy snags. I think it will be easier to understand if you know the motivation behind its development.

The Texas Rig was developed by a Texas angler in 1960. In the United States, many dams were built in the 1940s and 1950s to increase power supply. Lake Tyler in Texas was also a lake created by these dams. Fishing gear often got caught on trees in the submerged area, and the Texas Rig was designed to avoid this.


The difference between a Texas rig and a jighead rig is that while a jighead rig’s hook is connected to a sinker, a Texas rig puts a bead on top of the hook and connects a sinker on top of it.


◉ Carolina rig


As the name suggests, the place of origin is Carolina, USA, and when a light sinker is used, it is called a “North Carolina rig,” and when a heavy sinker is used, it is called a “heavy Carolina rig.”

The difference between a Carolina rig and a Texas rig is the gap between the sinker and the worm. This allows the worm to sink slowly under its own weight even when the sinker settles on the bottom.

◉ Split shot rig

Even beginners can easily make this by combining a worm and a clam shell at a certain interval, but you should be aware that the line may be damaged by the shell.

So, there are sinkers on the market that have rubber attached to the interlocking part.


◉ Down Shot Rig


This is the most commonly used tackle, and even beginners have heard of it at least once. It is a method that is often used when catching flatfish.

Developed in Japan, it is called a drop shot rig in English and is also known as an “under shot rig.”

The biggest difference from other rigs is that the sinker is positioned below the worm and hook. There is a lot of detailed information, so I will skip over it, but one thing to keep in mind is that the length between the sinker and the hook (commonly called the step) should be short when the sinker is light, and long when the sinker is heavy to reduce the foreign body sensation when the fish bites.


◉ Zika League


It is ironic that although it was developed in Korea, it is used more in Japan, and is called the Jika League, using the Japanese pronunciation of Jika, which means “straight” (直: じか).

It is simple to make by directly connecting the sinker to the eye of the hook, so it has the advantage of being able to be accurately vertically placed at the target point compared to the Texas rig, and reflecting its popularity in Japan, dedicated equipment is also sold separately.


Above, we briefly looked at rigs using worms, but there are many other rigs, such as the “Florida rig,” the “Alabama rig” for targeting multiple fish at once, and the “float rig” and “free rig” that use buoyant floats. However, we looked at rigs that can be used for sea bass lures and are suitable for use in the ocean.

Sea Bream Fishing (Part 6) – Bait and Habits

Among the baits prepared for catching red sea bream with a long-line fishing rod, the most popular are probably sand worms (honmusi) and dogfish.

Although black sea bream can be caught with floats and lures, float fishing is probably the most popular method. However, it is important to note that the ecology of black sea bream caught with floats is slightly different from that of black sea bream caught with long-distance fishing from the shore.

A long time ago in Japan, the black sea bream was nicknamed “nezumidai” (鼠鯛) because it was a fish that would eat anything it could get its hands on, like a rat. This shows that the black sea bream is an omnivorous fish that does not discriminate between plants and animals.

However, the feeding habits of black sea breams that live in deep ocean waters and black sea breams that live in relatively shallow coastal waters are slightly different, and the  closer they live to the coast, the more they are not picky about their food.

However, in proportion to this, the sea breams living near the coast are more wary of their greatest natural enemies, especially fishermen, and are also more agile.

Furthermore, since  the black sea bream, with its developed sense of smell, relies more on smell than sight for its feeding activity,  it reacts particularly strongly to the smell released when proteins break down.  That is why bait such as pupae are also used for black sea bream fishing.

Black sea bream also eat mussels and clams, but when fishing, they sometimes intentionally rot clams to make them smell bad, and using bait made by soaking squid intestines in them can also produce good results when fishing for black sea bream.

When looking at the feeding habits of black sea bream,  it is known that they generally prefer soft baits during the low water temperature period from winter to early spring, and hard baits during the high water temperature period from summer to fall .

However,  since the use of bait is limited in long-distance fishing compared to jigging, it is recommended to use bait that has a long-lasting scent and spreads far as possible. When using live earthworms as bait, it is helpful to use ones with a long survival period to catch fish.

That is why in Japan, the bait called taimusi or akamusi (タイムシ or アカムシ), which costs over 6,000 yen per 100g and is more expensive than honmusi that can survive in the water for more than an hour, is preferred as bait for red sea bream long-distance fishing.

Let’s mention again what we looked at in winter black sea bream long-distance fishing. In 1986, at the Fisheries Experiment Station in Okayama Prefecture, Japan, they attached transmitters to the bodies of black sea bream in November and February to investigate their movement distances. The experimental results showed that in November they moved about 42 km per day, while in February they only moved about 1.4 km.

However, the above experiment was conducted on black sea bream living in the open ocean, and the Tokyo Bay Black Sea Bream Research Association, a private organization that has been actively promoting black sea bream resource protection and release projects in Japan, conducted an experiment in which 3,719 black sea breams were tagged and released over a period of 10 years and tracked. Among the results, the notable part is that black sea bream living in the coast use breakwaters as their main territory, and even when they move, they migrate between breakwaters and near reef areas.

As can be seen from the experiment above, in order to catch coastal black sea bream with a long-range fishing line, it is best to focus on areas with reefs or obstacles such as underwater reefs.

Like Japan, many places in Korea also practice stocking, either temporarily or periodically. However,  to enjoy fishing for a long time, I believe it’s important to release any target fish caught during the fishing ban period, and to immediately release any fish smaller than the target size. With that in mind, I conclude this six-part series on “Empressed Sea Bream Long-Range Fishing.”

Sea Bream Fishing (Part 5) – How to Use a Dogfish Bait

When targeting black sea bream, especially in winter when targeting large ones, many people use gaebul as bait. The reasons for this preference include its relatively hard texture, which  prevents it from slipping off the hook easily ,  its reduced risk of attacks from small fish and other species (although the low winter water temperatures also play a role), and  its reduced bait change frequency, making it effective in cold weather .

However, the downside is that the bite rate is significantly lower compared to other baits. (The high price is also a downside^^)

And one of the advantages that can’t be missed by anglers who are also drinkers is that if they don’t catch a fish,  they can eat it as a snack with their drinks.

When using these types of bait, many people either insert a needle through the mouth or anus of the bait and let it come out of the body, or, in the case of smaller baits, they use a method of inserting the needle through the entire bait and pulling it out from the mouth to the anus or vice versa.

If you are not inserting the needle through the entire body,  it is better to insert the needle from the anus rather than the mouth, as this will cause less damage to the internal organs and keep them a little more alive .

You can tell the difference between a dog’s mouth and anus by looking at them, but if you touch them, you’ll notice a pair of hairs around the mouth and a lot of hair around the anus.

The method of threading a needle is the same as threading an earthworm.

First, press the anus to drain the water inside the body, then insert a needle into the anus.


Just push the dog up and pull the needle out of the body.

Especially  when inserting a needle, draining the water is absolutely necessary to make it easier to insert the needle and to reduce air resistance when casting.

And if there is a risk that the bait will fall off due to a needle or other snag coming out of the body over time, or if you are using a large piece of bait cut into pieces, it is helpful to use other baits such as earthworms as shown below.

Sea Bream Fishing (Part 4) – Finding the Spot by the Terrain Underfoot

I am writing a series about long-distance fishing for black sea bream on a white sand beach, but the content mentioned here is not limited to black sea bream, but can also be used to select points when catching fish with surf lures, including long-distance fishing, so it is recommended that you do as much image training as possible.

Over the past two sessions, we’ve looked at the overall selection of points based on waves and currents, and have explored which terrain is particularly suitable for winter. However, even this isn’t an easy task for beginners.

So today, without further ado, let’s learn where to look and cast once you arrive at your destination (especially a white sand beach).

When you arrive at your destination for a day of sand fishing, you’ll usually pitch a tent and prepare for the night. The most important thing you consider is where to pitch your tent.

I think most people would first set up their tent and then cast around it, finding a spacious and comfortable space without disturbing the surroundings.

As I mentioned earlier, the odds of catching a fish are relatively low in long-distance fishing compared to other types of fishing. Therefore, to guarantee a catch, you need to find a spot with a high probability of finding fish and focus on targeting it. However, pitching your tent in a location far removed from such a location from the start means you’re unlikely to have a good catch.

So, once you arrive at the white sand beach, where should you set up your tent, what should you see, and what should you do to find your vantage point? Today, we’ll explore the final step: judging by the terrain beneath your feet.

The most important things to consider when finding a spot are changes in terrain, changes in water, and baitfish . However, these are all difficult to identify at night.

So, when you arrive at your destination, check the coastline to see if the sand is straight or curved like a bow. If the coastline is curved like a bow, it is better to pitch your tent around a concave point or a convex point like the photo below.

The next thing to look for is a change in the bottom, which means finding a place where there is a lot of gravel or seaweed in a certain area, even though the surrounding area is all sand.

In front of places like this, there is a very high probability that there is a sandbar that creates waves as I mentioned last time, or a place where rip currents form.

In particular, in the case of rip currents, it is not easy to distinguish them with the naked eye, but if you look at the place where the rip currents are formed, unlike the surrounding sea, there is no foam, and if you look at the white sand beach connected in a straight line here, you can see that there is a lot of seaweed washed in by the waves, as shown below.

Another spot to look for is where the elevation differs significantly from the surrounding terrain. While it’s impossible to discern with the naked eye at night, during the day, you can see spots like the photo below where waves sweep away sand, creating a hazy, murky appearance. This is precisely where the elevation difference occurs, and where foam forms when waves roll in.

Here’s what this spot looks like at low tide. You’ve probably experienced the sudden, sudden surge of depth at a beach during your summer vacation, and you’re probably surprised. This is the exact spot. Such spots exist even far out in the ocean, making them excellent vantage points.

The topography of this sea is divided into low-lying types created by waves and currents and high-lying types created by the seabed topography. Both types are good fishing spots. If there are no other anglers around, casting diagonally rather than straight on will also help with catching.

If you can’t see the waves well at night and can’t tell where the rip current is coming from, you should at least use a headlamp or light to look for signs of the waves.

As shown below, the distance the waves have traveled varies, but in the areas where they have traveled the most, seaweed that has also been washed in can be seen.

In places like this where there is seaweed washed up on the beach, it is best to aim for the area in front of it, and even in such cases, you should remember to cast past the point where the beach break occurs.

How to improve surf lure distance

Lure fishing on white sand beaches or the seaside can be broadly divided into shore jigging and surf lure. Shore jigging mainly uses metal jigs (plugs), and fishing using metal jigs and plugs weighing 20 to 60 grams is called light shore jigging, while fishing using jigs weighing 100 grams or more is generally called shore jigging.

In contrast, the biggest difference between surf lures is that they are fished not only with metal jigs but also with worms and other various tackle. Rather than trying to define the concept clearly, it would be better to understand both as a method of lure fishing done on the beach by casting far away and catching.

I plan to cover this in more detail in several installments, but distance is a key factor in surf lures and shore jigging.

Of course, using a heavy metal jig will allow you to cast a certain distance, but unlike the sinkers used in long-distance fishing, the tail of a metal jig can shake violently when flying. If you just reduce the rotation of the tail, you can increase the cast distance by more than 30%.

Let’s take a look at what you need to keep in mind to improve distance, which is an important factor in long-distance fishing, even when using surf lures or shore jigging.


First of all, there is a lot of information on the internet about improving casting distance, so let me briefly summarize a few things.


① Suitability of the equipment used

To increase lure distance, it’s crucial to properly set up your tackle. A point that requires a jig weighing 100g or more will be difficult to reach with a 60g jig. Similarly, using a 30g metal jig with thicker line, such as a No. 2 or No. 3 braided line, will limit distance gains. Therefore, it’s crucial to set your tackle appropriately for the target point and the weight of your metal jig (or other lure) for the species you’re targeting.


② Use thin lines if possible.

Even with a heavy jig, distance is only achieved if the line is balanced. When casting, the line unwinds from the spool and passes through each guide. The thicker the line, the greater the load on each part, reducing distance.

Therefore, if you were unable to exceed 100m using PE 1.5 before, you can get close to or exceed it by simply changing to PE 1.


③ Let’s practice pendulum casting.

This method is a popular casting method for long-distance fishing, especially sports casting. Since the length of the rod used for surf lure or shore jigging is shorter than that used for long-distance fishing, even beginners can learn it without much difficulty.

The casting method is to swing the ball left and right and then throw it when it reaches its highest point. At first, focus only on distance and practice. After a certain amount of distance has been improved, it is best to work on accuracy.

Of course, shortening the length of the line you drop will help increase accuracy, but it won’t help with distance, so it’s best to practice and figure out the length that’s right for you.


④ Other

Among the equipment or tools that help improve distance, the first one that  comes to mind is a PE line coating. I can tell you from experience that fluorine coating helps with distance, but since it is not appropriate to mention a specific product name, I will just say coating.

The Difference Between Jigging, Slow Jigging, Shore Jigging, and Light Shore Jigging

First of all, the difference between jigging and shore jigging  is that jigging is done on a ship, and shore jigging is done on the shore . 

Note: What is the difference between surf lure and shore jigging?

Compared to jigging, which targets target fish by dropping a metal jig directly from a boat, shore jigging lures target fish by moving the metal jig horizontally. Another difference is that when jigging from a boat, you don’t have to cast far, but in shore jigging, you cast far.

Of course, the gear used for fishing on a boat and fishing on the shore or a breakwater cannot be the same, but this is not entirely impossible, and  I think that there is no need to prepare different types of gear for each genre, especially when it comes to surf lure fishing.

As to why this is so, you can see why it is divided into “shore jigging” and “light shore jigging.”

Shore jigging and light shore jigging both use metal jigs to catch fish such as mackerel, flounder, and sometimes even flatfish, but  there is no clear definition of what is shore jigging and what is light shore jigging.

That is, even though there is no clear distinction between the weight of a metal jig of up to a certain number of grams as light and the weight of a metal jig of more than a certain number as shore jigging, it cannot be overlooked that many anglers use the terms shore jigging and light shore jigging without even knowing their meaning.

I have mentioned many times that this type of fishing is a way for rod manufacturers to increase their sales, and they have  gone a step further than simply categorizing rods into shore and light shore to increase sales, and now the term “super light shore” is also being spread.

Here is an example of a product being sold without a clear definition of shore and light shore.  Among the jigging rods from Japanese company D, there is one that states, “This is the standard rod for light shore,” and states that the maximum weight of the metal jig that can be used is 60g.

Because of this, there is an increasing number of people in Japan who are famous for fishing who call rods under 60g “light shore” and rods under 20g “super light shore,” and this is becoming established as a genre . I would like to emphasize once again that whether it is 60g or 10g, they are all considered shore jigging, so there is absolutely no need to purchase a separate rod . 

One more thing to add is that in this segmentation of shore jigging, terms created by anglers such as “shore slow jigging” and “shore wall jigging”  are now being used. Fishing terms that are created or accepted indiscriminately without a definition of the concept should be refrained from being used for the sake of establishing a healthy consumer culture.

It’s obvious to everyone that these things are especially often caused by Japanese companies, but  when I see some programs featuring famous celebrities (this is not an outdated idea of ​​favoring domestic products)  , wearing clothes that are practically plastered with Japanese products, holding Japanese products in their hands, and fishing in Japan’s Tsushima Island,  I can’t help but feel bitter and wonder , “Have they ever made an effort to think about the issue of comfort women, where they claim even Dokdo is their land, and where there has been no progress at all?” 

Let’s return to the topic and look into “shore slow jigging” and “shore wall jigging” a little more. There is no clear explanation of the concept of slow jigging, and even if there is, there are many incorrect explanations. First, let’s define the concept. “It is a method used when targeting rockfish with low swimming ability or when the activity of target fish species such as bushfish or yellowtail is low, and it does not require intense action.”

The fact that it doesn’t require any intense action means that you can use somewhat softer rods than with regular jigging, which also means that it’s easy for anyone to enjoy.

In fact, slow jigging is known to have originated in the Akashi Strait of Japan, where the currents are very fast and the target fish species on the seabed do not move much. Slow jigging was created to apply this type of application, and those who enjoy lure fishing now can enjoy slow jigging with the equipment they have (sea bass, egging, jigging rod).

“Shore slow jigging” is a combination of slow jigging that started on a boat and shore jigging. Compared to regular jigging, when the fish are less active, the fish cannot keep up with the speed of the metal jig, so the moving action is limited to allow for a bite.

And quay jigging is similar to ship jigging, and it is a type of jigging where a metal jig is dropped vertically from a quay wall, which is a structure that allows ships to safely dock to unload cargo and board passengers.