Why shouldn’t I submerge the spool in water when washing the reel?

When asked to name the first thing beginners do after returning from a fishing trip, they would say without hesitation that it is to clean and store the equipment they used.

But in fact, what beginners should do before washing the reel is to at least wipe the rod guides with a wet tissue, as explained in the “How to take care of your gear after fishing.” 

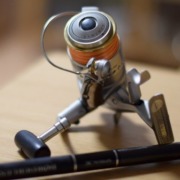
One of the questions that people who are trying to clean their reels or have washed them a few times ask is, “Can’t I submerge the entire spool in water?” In my article “How to Care for Your Gear After Fishing,” I did not go into detail about submerging the spool in water, but I did advise against it. Today, I will look into why. 

In the previous post titled  “ How to Clean a Reel for Beginners  , it is written that when cleaning a reel, you must tighten the drag tightly and then wash it under running water.

The reason is that water may seep into the body, washing away lubricants (oil and grease) and reducing the function of the drag washer. Therefore, it is recommended to lock the drag and wash it with water. Also, make sure to spray water from above. If you spray it from the back, it will be easier for water to seep into the inside.

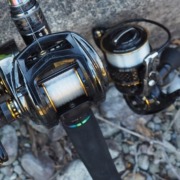
And, as previously mentioned,  turning the handle while washing the reel is a no-no. Even if the reel is waterproof, turning the handle increases the likelihood of water seeping in, so avoid turning the handle while washing.

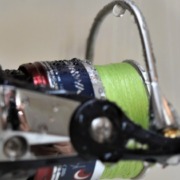
Now, let’s take a look at which parts of the spool, such as oil or grease, are washed away when you immerse them directly in water.

First, if you disassemble the drag knob, you will see that it is coated with grease as shown in the photo, and the felt washer inside the drag is also coated with grease. If you submerge the entire spool in water, the lubricant applied to these parts will be washed away, and the higher the water temperature, the greater the possibility of this happening.


※ Even if you completely lock the knob and wash it, moisture may seep into the inside, so after washing, be sure to remove the knob, check for moisture, and then remove it.

Another possibility, though not common, is when you buy a used reel and the previous owner has added bearings to the inside of the spool while customizing it, commonly known as tuning.

Lastly, grease is also applied to the back of the spool, especially the back of the spool, which is the part that comes into contact with the spool adjustment washer what is the washer on the reel used for ?) that adjusts whether the line is wound forward or backward, so it is not good for moisture to get in, and after washing, you must check and remove any moisture using a cotton swab, etc.

In closing, I would like to emphasize one thing. Many people know that after washing the reel, you should store it with the drag knob off to prevent the felt washer and spool adjustment washer from deteriorating. However, many people neglect to store it with the reverse lever in the off position. However, since it may try to reverse while stored, I would like to tell you that it is better to store it with the reverse lever in the off position.

How to care for your gear after fishing

After returning from a fishing trip, it is recommended to wash the fishing rod and reel at least once every 3 to 5 times to remove salt and contaminants.

The most important thing is to remove salt, and today,  following the reel cleaning method we learned last time , we will learn about how to maintain a fishing rod.

In addition to salt contamination from seawater, fishing rods can also become contaminated with dirt from handling bait with hands that have touched the rod. If left untreated for long periods, damage to the rod is inevitable. However, unlike cleaning a reel, maintaining it is quite simple.

First, focus on spraying water on the reel guides and reel seat. For other equipment, soaking in a container filled with water can remove salt. However, submerging the reel spool in water is not recommended for those who don’t know what type of grease to apply to the drag or who are unable to disassemble and reassemble the reel.

In this case, it is recommended to refer to  the reel cleaning method we looked at last time  and wash only the line with running water while fully tightening the drag .

Now, let’s learn about how to clean and maintain a fishing rod.

First, detach the back cap of the fishing rod so that water can drain out even if you spray it.

If it doesn’t damage the fishing rod, you can leave it on the bottom and spray water on it.

This is often not the case, so make sure to spray water while the fishing rod is upright.

Again, washing with water is to prevent damage from salt. Therefore,  the most important parts to be careful of are metal parts, including the guide frame.

When you look at how people usually clean their rods after finishing fishing, you will see that they only focus on cleaning the surface of the rod, but  it is better to clean the metal parts such as the guide frame, guide ring, and reel seat in more detail .

After washing the rod with water, wipe it with a towel or kitchen towel and dry it in the shade with the back cap removed.

After washing and drying the rod in this way , you can use it for a longer time by applying a commercially available  rod and guide coating agent .


Especially in the case of a rod with a plunger, if the rod does not come out easily or smells when removed, it is necessary to wash it so that water can enter the inside of the rod.

However, for those who don’t want to go that far~^^, I recommend that you at least wipe it with a wet tissue containing a salt neutralizer that is currently sold on the market, and I will end this article by saying that it is necessary to focus on wiping the guide area in particular.


What is the reel washer used for?

Surprisingly, many people are unaware of the washer included with every reel, specifically the “spool adjustment washer.” Let’s explore the function of this washer to see what changes it makes to the reel.

First, the taper (the tapering of one side) of the reel’s spool can be categorized into three types: a square taper, a trapezoidal taper, and a reversed trapezoidal taper. The current consensus is that a straight taper is preferred for distance, while a reversed taper is preferred for line trouble prevention.

Washer

Assuming that the shape of the spool is a regular taper, the shape below is obtained when the line is normally wound up to the spool edge.

However, if the line is not wound in the shape of a regular taper, but is wound in a reverse trapezoid shape with the line leaning forward,

Or if it is wound in the shape of a pure taper that is pushed towards the back of the spool.

Let’s see how we can use spool adjusting washers to adjust the shape of the taper.


For ease of understanding, the model used is Shimano’s Airnos model, which is versatile.

First, separate the spool from the reel by turning the drag counterclockwise.

The part in the picture below is a washer.

Washers come in three sizes.

If you wind the line on an Airnos reel with a regular taper shape and it is in the shape of a trapezoid, the spool is down, so add a washer. If it is the opposite, replace the washer with a thinner one or remove it.

However, when the line is wound on a reel with a spool shape that is often used in one-two fishing, if it is wound in a shape with a positive taper, the line will be pushed upwards, so a washer must be added.

The Difference Between Spinning Reels and Bait Reels

The most common reels used for lure fishing are spinning reels and baitcasting reels. While  there are “spincasting reels,” which appear to combine the functions of both spinning and baitcasting reels, these are not as widely used.

I plan on writing a separate post about spin casting reels, but to put it briefly, they look similar to LBD reels, and when casting, the line is released by pulling and releasing the lever, so even if a clumsy beginner uses them, there is less chance of problems such as line trouble, so I have one because I don’t have to worry too much when going out with children or family members.


However, for those somewhat experienced in fishing, this reel isn’t a good fit. This is because it only supports nylon line (other lines can be used, but they present numerous structural issues), doesn’t offer much distance, and is very difficult to cast with light tackle.

However, if you plan to enjoy fishing with young children, it may be difficult to focus on fishing yourself while taking care of children who are not familiar with using the equipment, so it might be a good idea to prepare a relatively inexpensive spincasting reel.

Now, let’s get down to business and examine the pros and cons of spinning reels and bait reels. While spinning reels are still the mainstream choice for bass lure fishing, recent advancements in bait reel technology have led to a steady increase in their use.

The biggest difference between a spinning reel and a bait reel is that the part that is mounted on the rod is below for a spinning reel and above for a bait reel. Next, the direction in which the spool that releases the line rotates is vertical to the rod for a spinning reel, while for a bait reel, it rotates in a straight line with the rod. This is the biggest difference that can be seen with the naked eye.


Spinning reels and rods


Bait reel and rod

The difference is that since the spools rotate in different directions, the line that is released in a spinning reel forms a spiral and experiences a lot of resistance from the guide, while the line that is released in a bait reel is released in a straight line and experiences less resistance.

Due to these structural differences, spinning reels and bait reels differ in many ways. Let’s take a look at them one by one.


distance

Spinning reels release the line wound on the spool as is, whereas bait reels release the line by rotating along with the spool, so bait reels have a longer casting distance.

There is still a lot of controversy about what word goes in the ○ space above, and the most common question about distance is, “Spinning has better distance,” “Bait is better once you get used to it,” or “Bait is the world record.” Since this is such a controversial issue, I reserved my personal judgment and left it as ○.


Sensitivity to feel

While spinning reels are held only by the rod, bait reels are used by holding both the rod and the reel together, so bait reels are superior in terms of sensitivity.

Also, when winding the line, a bait reel that can be wound in a straight line can feel the sensitivity in the water better than a spinning reel that rotates in a spiral and receives resistance from the guide.


Spinning reels have a severe line fraying problem.

Bait reels release the line in a straight line as the spool itself rotates, but spinning reels release the line from the spool in a spiral shape, making it easy for the line to become entangled.


Bait reels are inconvenient for light tackle.

Structurally, spinning reels are ideal for casting lighter tackle farther. However, “Bait Finesse,” a device designed to compensate for these shortcomings of bait reels, has recently been gaining significant attention.

The word  “Bait Finesse” literally means “delicate” in French, “finesse”, and refers to a reel that is made to allow for precise and delicate casting to pinpoints using light tackle such as “no-sinker worms”.


Difference in power

Bait reels can structurally be equipped with large gears, and spinning reels that wind the line with a line roller do not fully transmit power because the load is applied to this point, while bait reels that mount the reel on top of the rod can exert greater power because the power transmitted to the rod is even and wide.


Bait reels cannot change the direction of the handle.

Most spinning reels have handles that can be swapped left and right, although there are some things that cannot be changed in the cheaper models, but bait reels cannot change direction.


Differences in casting movements

Spinning reels require more action per stroke than baitfish reels because the bail must be opened and cast before casting. This can lead to increased fatigue in situations like bass fishing, where frequent casting is required over relatively short distances.


Line Trouble

Compared to spinning reels, which are prone to line fraying, bait reels have a difference: when the spool rotates faster than the line is released, a phenomenon called “backlash” occurs. To reduce this backlash, a motion called “summing” is used. A similar motion is called “feathering” when using a spinning reel.


backlash

Difference in lines

Spinning reels can use thick lines, but the line can easily get tangled, so when using thick lines, the spool size must be larger to reduce the tangle and line trouble.

However, in the case of bait reels, it is easy to use thick lines even on small reels, and there is no difference in casting distance even if there is little line left on the spool, but in the case of spinning reels, when there is little line left on the spool, the line brushes against the edge of the spool when casting, and the resistance received increases, reducing the casting distance.

Why are the screws on the reel painted?

Even among those who have some knowledge of reel disassembly and assembly, there are surprisingly many who do not know the purpose of the paint applied to the threads when the reel is disassembled.

That’s why most people don’t prepare the necessary supplies, and this can cause other problems. So today, let’s find out why the screws (or threads, to be exact) used to assemble the reel are painted.

The screws used to assemble the reel are  not actually painted, but rather a type of low viscosity liquid adhesive applied to maintain the bond of the screws, which may become loose as the reel is used .

Often times, when beginners first disassemble a reel and ask themselves,  “Why are the screws so tight?”,  this adhesive is often the cause.

The name of this adhesive applied to the screw threads is ‘screw-locking agent’. It is readily available on the market at a low price and is an essential item for reel maintenance, but it is rare to find someone who has ‘screw-locking agent’.

For example, among the bait reels I own, there are cases where the screw that secures the handle nut cover becomes loose and falls off. If the screw of the reel becomes loose like this, in the worst case, it may fall off or you may experience an unnatural feeling such as a rattling sensation, making it uncomfortable to use.

Since I mainly use spinning reels, let’s take a look at spinning reels as an example. When you first disassemble the reel you are using, unlike other reels, some have a ‘thread lock’ applied to the threads. Once the thread lock is applied, its lifespan ends when you disassemble it, so it is a good idea to reapply it when you reassemble it.

When a company releases a product, the screws on the line roller are the areas where this type of screw-loosening agent is mainly applied. If you disassemble it, you can see that it is covered in orange screw-loosening agent, as shown in the photo.

Screws coated with anti-loosening agent like this were designed to compensate for the possibility of loosening when released by the manufacturer, so it is necessary to re-coat screws coated with anti-loosening agent when disassembling and then reassembling them.

Of course,  you don’t need to apply anti-loosener to every screw on your reel.  However, at the very least, you should apply it to the screws on the line roller and the screws that secure the slider (Daiwa calls this the oscillating post, Shimano calls it the slider guide) that allows the spool of a spinning reel to move up and down.

Before we wrap up, let’s look at one more thing that anglers should have when maintaining and servicing their gear.

We often see cases where rust forms on the guide ring when the rod is not maintained and only then is it removed. It is good to wash it with water or use a tissue containing a salt remover to remove the salt, but it is also very useful to prepare anhydrous ethanol, which is easily available on the market.

Anhydrous ethanol is used to make mosquito repellent in the summer, but it also has a disinfecting effect, so if you wipe the EVA grip of a fishing rod or the handle knob of a reel with it, you can use it in a clean state. It is also very effective in removing stickiness that cannot be removed with just a wet towel or tissue, and it is also effective in restoring the luster of a rod grip that has faded from long-term use.

Is it okay to use WD-40 when servicing a reel?

Although it is not very common, you will often see posts saying that they used WD-40, which is readily available on the market, as a lubricant for their reels. Some people even claim that spraying WD-40 on their reels made them spin better, eliminating the need to buy a special lubricant. However, this is not recommended as it can damage the reel.

So this time, let’s find out why you shouldn’t use WD-40 as a reel lubricant.

WD-40 was named after Iver Norman Lawson of the Rocket Chemical Company in San Diego, California, in 1953, who was researching a formula to replace stagnant water, the cause of corrosion, and succeeded on his 40th attempt.

The official name of WD-40 is Water Displacement, 40th formula (or Attempt) when translated into Korean  . However, if you look at the cautions listed on Namu Wiki, it says , “Never use it for lubricating high-speed rotating and moving parts where hard lubricants are applied.”

If you look a little more closely, you can see that it says,  “High-speed rotating parts generate a lot of heat, and the problem is that if you spray WD-40 here, it will melt and remove all the existing medium- to high-viscosity lubricants, and the WD-40 components will soon evaporate due to the heat generated in the high-speed rotating parts or moving parts .”

Also, the WD-40 product instructions say,  “WD-40 thoroughly removes not only impurities caused by rust and corrosion, but also dirty residues from regular oils and greases that have already been used.” Just looking at these contents alone, you can see that WD-40D should not be used as a substitute for lubricant and grease for fishing reels, but let’s take a closer look.

Lubricants typically use antioxidant additives to increase oxidation resistance by mixing in additives to prevent sludge or varnish buildup at operating temperatures, but WD-40 does not use such additives. Above all, there is no information at all about the content of rust inhibitors added to lubricants, which is important information for reel maintenance, but the general opinion of experts is that WD-40 does not contain these.

This means that depending on the operating environment, the bearings are prone to corrosion, so applying WD-40 to the bearings of the reel you are using could cause fatal damage.

A frequently asked question is about disassembling and assembling a reel. Unless the reel is in a condition that can be thrown away or it is not a big burden if it becomes unusable, it is usually more economical to leave the disassembly and assembly of the reel to a professional.

In fact, if you try it a little, you will realize that disassembling and assembling a reel is not that difficult, but I would like to point out that overlooking the fact that it requires more skilled skills than simply disassembling and assembling can increase the possibility of problems occurring or shorten the product’s service life.

As we saw in the previous  article, “ Why are the screws on the reel painted?”, reel manufacturers apply a screw-locking agent to the screws to prevent them from loosening. When disassembling and reassembling the screws, it is necessary to repaint them. However, those without experience can easily miss these small details, so even if it is not immediately apparent, it can shorten the lifespan of the reel.

Even if you think of it as just a single screw, the manufacturing company sets the exact value for the strength of the screw tightening based on meticulous calculations. For anglers who do not know these details, especially when it comes to expensive reels, it is better to ask a professional to do the job.

Also, it is better not to use WD-40 when cleaning reel parts. Inexperienced anglers may not know this, but it can damage the resin contained in the reels. Therefore, it should only be used on metal parts. Since anglers do not know these details, it is better to refrain from using it at all.

Finally, although the image size is small and the resolution will decrease when enlarged, I will conclude the discussion by looking at an experiment comparing WD-40 and a special lubricant.

The parent company conducted an experiment in which they cleaned the line rollers thoroughly, applied genuine oil and WD-40 to each, soaked the line rollers in salt water with a concentration twice that of seawater for 1 minute, and then wound the line 50 meters 50 times, soaked them in salt water for another minute, took them out, left them for a day, and observed the operating condition and bearings of the line rollers. The results of the experiment confirmed that the line rollers of the reels applied with WD-40 did not work, but the line rollers of the reels applied with genuine oil worked normally.

And the results of disassembling the line roller and inspecting the bearings showed that the one that had WD-40 applied had red rust, while the bearings of the reel that had genuine oil applied had the same amount of salt crystals observed, but they still worked.

Finally, I put the genuine oil and WD-40 in a container and stored it in a refrigerator set to 8℃. When I took it out, I observed that the WD-40 had completely solidified. If this actually happened to the reel, it goes without saying that damage to the parts would be obvious.

Of course, there are WD-40 products that can be used in temperatures from -18℃ to 148℃, but it is much better to buy the genuine product, which is advantageous in many ways.

In conclusion, WD-40D is a solvent that dissolves lubricants, so it is recommended to use it only when cleaning the parts before applying lubricant to the reel. However, since many people do not know much about the specific materials of the reel, it is better not to use it at all. This is the conclusion of today’s posting.

Lastly, let me add one interesting story. Among the urban legends circulating among American anglers, there is one that says that the main ingredient in WD-40 is fish oil, which makes it so effective at catching fish. However, this is also nothing more than a rumor spread by American anglers that has nothing to do with the truth.

As the length of the fishing rod increases, will the casting distance also increase?

Many anglers who enjoy long-distance fishing seem to believe that longer rods increase distance and that casting at a 45° angle will allow for the furthest throw.

Of course, this isn’t entirely wrong, but it’s not 100% accurate either.

So how much does a longer rod length increase distance? And is throwing at a 45° angle ideal?

Let’s take a closer look at these two extremely common yet somewhat misunderstood facts, using the power of physics, in several installments.

Today, let’s look at the difference in distance depending on the angle of flight and the height of the release point of the casted ball in the first order.

First, as is commonly known, when casting at angles of 30°, 45°, and 60°, the 45° angle will fly the farthest. However, there’s a hidden assumption here.


That is, it is assumed that the angle when thrown from 0m above the ground is 45°.

For example, beginner shot putters are taught to release at a point closer to 42° rather than 45°, and as their skill level improves, they are taught to lower the release angle to 36°, thereby improving distance.

Why is it 36° and not 45°? That’s because shot putters release their weight not from the ground, but at a point about 2m away, depending on their physique.

Let’s take a closer look at this in a picture.

First, if the end of the rod is cast at an angle (θ₀) that is horizontal to the sinker, the landing (or launch) angle is 90°-θ₀, which we will call θₑ. Therefore, θ₀+θₑ=90°, and the most appropriate casting angle for θ₀ is as shown in formula (2) in the figure.

So, assuming all participating athletes are of equal physical condition, what is the most important factor in achieving the shot put record of 23.37 meters set by Ryan Crouser of the United States on June 19, 2021? The answer is throwing speed!

If all athletes release the shot from a height of 2 meters, to achieve a record of 23.37 meters, the throw would have to be at a speed of 14.5 meters per second and an angle of 42.5 degrees. Otherwise, if the throw were to be at 14 meters per second, the record would remain at 21.89 meters.

Likewise, let’s remember that even with the same length of rod, the distance will inevitably differ depending on the speed at which you swing it when casting, and then move on.

When casting a rod, the rod bends as you can see now due to the weight of the sinker and the speed at which the rod is swung, but here, let’s assume that there is no spare line and the rod does not bend, and let’s find out how much of a difference there is in the casting distance using rods with lengths of L₁ (4.5 m) and L² (5.3 m).

But while I see people claiming that using longer rods increases their distance, no one can tell me how much of an increase they actually get. Furthermore, even the companies that manufacture and sell rods don’t seem to know. In fact, they don’t seem to even try to find out.

But it is sad and ironic that they only advertise that it is increasing.

The reason you don’t know how much distance you’ve gained after using a longer rod than you’ve been using is likely because the difference wasn’t noticeable or you don’t have the physique and physical condition to handle a rod of that length.

First of all, it is scientifically clear that in order to achieve the effect of increasing distance by using a slightly longer rod, the swing speed must be the same as when casting with a shorter rod.

In order for the distance to increase when throwing with a 5.3 m rod compared to when throwing with a 4.5 m rod, the angular velocities of θab and Xab XAB as shown in the figure must be equal to or faster.

As you can see in the picture below, the distance of one-two fishing differs when the release points are B, C, and D. If the location of the release point changes, the projection angle changes, and if the projection angle changes, the reaching height changes, which ultimately results in a difference in the distance.

Therefore, the difference in distance depending on the length of the rod must be calculated by calculating several important factors as described above, so we will cover that next time. Today, let’s compare the distance when throwing the shot put, which weighs 7.257 kg, which is the international standard, from 2 m to 3 m in 20 cm increments at a speed of 14.5 m/s, which is the speed at which a world record was set.

1) Release height 2.0m: distance 23.35m

2) Release height 2.2m: Distance 23.53m

3) Release height 2.4m: distance 23.71m

4) Release height 2.6m: distance 23.89m

5) Release height 2.8m: distance 24.07m

6) Release height 3.0m: Distance 24.25m


If we draw a graph of the difference in distance according to the release height, it is as follows. A higher release point height for shot put means a longer rod length for long-distance fishing, so it is clear that the longer the rod, the greater the distance.


So how much does the distance increase? We’ll discuss this next time, but we’ll end today’s discussion with an example.

The Secret of the Square Root (√) Hidden in the Fishing Line

If you compare the fishing lines used by experienced and novice anglers, you will find that the less experienced angler is, the thicker the fishing line is.

The reason for this is probably that when a bite comes from a big fish that seems like it could be caught, there is an underlying anxiety that the fishing line might break because it is weak. But is it really difficult to hook a big fish if the fishing line you use is thin?

But to be clear, that’s absolutely not the case. In reality, it’s possible to easily catch large objects weighing more than its tensile strength, though this obviously requires skill.

So, from now on, let’s look at some things that beginners should know when choosing the thickness of the fishing line, or number.

First, let’s take another look at the most basic fishing line sizes.  As we learned in “History of Fishing Line – How Are Sizes Made?”, the size of nylon lines has been used since 1947, when the company, which was originally named Dongyang Rayon but changed its name to Toray in 1970 and began producing fishing lines under the brand name Toray, first produced a nylon fishing line called “Eunrin” (Silver Scale), and designated the diameter of size 1 fishing line as 0.165 mm.

However, in the case of PE, which is the most commonly used material these days, there is no set standard, so when you buy a reel and reel in the line with the specifications that say ○○m of line can be wound, you often end up winding less.

Since Japan established a standard for PE yarn in 2010, which was different for each individual, companies that produce reels now indicate the amount of yarn in their specifications according to the following criteria. However, very few people know that the number of fishing lines is hidden in the square root of 2 (√2).


※ Note: Standard diameter of PE

lake
robbery
Standard value
Standard diameter
lb
kg
Denier (d)
mm
0.1
4
1.81
20
0.054
0.15
4.5
2.04
30
0.066
0.2
5
2.27
40
0.076
0.25
5.5
2.49
50
0.085
0.3
6
2.72
60
0.094
0.35
7
March 18
70
0.101
0.4
8
3.63
80
0.108
0.45
9
4.08
90
0.115
0.5
10
4.54
100
0.121
0.6
12
5.44
120
0.132
0.7
14
6.35
140
0.143
0.8
16
7.26
160
0.153
1
20
9.07
200
0.171
1.2
24
10.89
240
0.191
1.5
30
13.61
300
0.209
1.7
34
15.42
340
0.219
2
40
18.14
400
0.242
2.5
50
22.68
500
0.270
3
55
24.95
600
0.296
4
60
27.22
800
0.342
5
80
36.29
1,000
0.382
6
90
40.82
1,200
0.418
8
100
45.36
1,600
0.483
10
130
58.96
2,000
0.540


We know that as the lake gets bigger, the thickness of the line also gets thicker, but we don’t necessarily need to know the criteria for the thickness and whether it is proportional, but knowing it will help us understand fishing lines.

If you look at the back of the composite product that is readily available on the market and used by many anglers, you will see the specifications listed below. Looking at the diameter of No. 1, you can see that it is 0.171mm as shown in the table above, and No. 2 is 0.242mm.


Those who saw the title would have already noticed  that the size of the fishing line is proportional to the square root of the diameter (√2) . (0.171mm x √2 = 0.241mm)  Also, the tensile strength of a wire material such as a fishing line is proportional to the cross-sectional area, and in the product specifications, you can see that the tensile strength of No. 2 is slightly less than twice that of No. 1.

The answer to the question of which lake is best to choose for fishing lines that have the secret of square root 2 (√2) can be found in a paper written by Professor Hideki Ohama of Yamanashi University in Japan.

The paper observed the pulling force (tension) and duration of time when the fish were hooked by lure fishing with salmon and rainbow trout that were 50 cm long and weighed 1.7 to 1.8 kg. According to the results, the maximum tension at the moment was 2.4 kg for salmon and 2.9 kg for rainbow trout.


That is, it was discovered that a tension of approximately 1.3 to 1.7 times the body weight was applied, and the time until maximum tension was applied was approximately 70 seconds after being caught on the needle, and after 150 seconds, it was reduced to 1/5.

If we break this down a bit, even excluding the resistance according to the angle of the PE to the surface, the fish caught on the hook shows a struggle that reaches its peak around 70 seconds as it gradually increases its swimming speed against it. This can be said to explain that the fish caught on the hook gradually loses strength after 70 seconds due to the resistance (square of the speed) felt by its body.

For reference, if a fish is 1 m long and weighs 10 kg, has a body diameter of 20 cm, and swims at a speed of 60 km/h, the maximum tension is calculated using the following formula.

Maximum tension = (1/2) × drag coefficient × cross-sectional area × seawater density × speed². Therefore, the maximum tension exerted by a 10 kg object is approximately 13 kg.

In other words, this means that even a 10kg fish can be easily caught with a No. 2 PE line. Therefore, beginners should understand that there’s absolutely no problem using a line that’s a bit thinner than they think. Rather than using thicker lines, it’s actually more beneficial to regularly check the line for damage.

Is there really a relationship between line thickness and casting distance?

The use of PE (composite) lines is becoming more common not only in long-distance fishing but also in lure fishing. In the last  article on “How to improve the distance of surf lures”, I was unable to provide objective and specific evidence for the content that said, “If you couldn’t go over 100m using a No. 1.5 PE line, you can get close to or exceed it by changing to a No. 1 PE line.” Then, I found that a monthly magazine called Leisure Fishing published in Japan conducted such an experiment, so I’m posting a brief summary of the content.

The experiment consisted of three parts:

First, the change in distance according to the thickness of the line

Second, the change in distance depending on the material of the arrow used (tungsten and lead)

Third, the change in distance depending on the number of needles used.

First, in order to find out the change in distance according to the thickness of the line, the rod used was a 9.8-foot bass lure rod and a 3000 spinning reel. The lure used was a 12cm minnow. Without attaching a hook, I made 3 full casts with PE lines of size 0.8 and 1.5 and compared the results.


According to the experimental results, the difference in distance depending on the thickness of the line is about 10m. In reality, if the distance differs by about 10m in a fishing spot, it can be said to be a significant difference.


Of course, the scientific objectivity of the experiment cannot be guaranteed, but the results are certainly meaningful.

Second, the equipment and supplies used in the experiment on the change in distance according to the material of the arrow used (tungsten and lead) are as follows.

Road: Kiss Special 405CX

Reel: Super Aero Kiss Special

Line: 0.6

Himsa: 0.8~7

Bongdol: Tungsten and lead bongdol of No. 30


It is commonly known that if the weight is the same, a tungsten weighted arrow will travel farther due to less air resistance, but the experimental results showed that the tungsten weighted arrow had a better distance.


Although the experimental results showed a difference in distance exceeding 13 meters,  it is right not to use lead billets because they are illegal.

However, even if it is a lead-based sinker, it is legal to use one that has been coated to prevent lead from leaking into the water.

The third experiment was conducted using barley anchovy rigs with 3 and 8 needles attached to each rig, and the results showed a difference of approximately 5 m.

Although the method and conditions of the experiment were not scientific, it was very meaningful in that it answered the question that had been raised for a long time: “How much does the thickness of the line affect the distance?” and that it allowed us to actually confirm the difference in distance depending on the material of the sinker.

How to view Shimano’s spool compatibility chart

It seems that there are not many people who have spare spools while fishing, and when it comes to replacing spools, many people don’t know which ones are compatible with their reels.

In particular, most people who use spinning reels keep a spare spool ready and use it, and I think there are probably two main reasons for this.

① When using a composite rod and connecting a shock leader, prepare in advance for line breaks.

② When you need to increase or decrease the amount of lines while using the same body size


In case ①, you can feel the effect greatly when you are doing FG knots on site in cold weather and your fingers are numb and uncomfortable. Today, following the last  “Daiwa Spinning Reel Spool Compatibility Table and How to Read It,” we will learn how to read Shimano’s compatibility table.

First off, Shimano’s spool compatibility chart is much easier to understand than Daiwa’s. However, even the compatibility chart on Yunseongjogu’s website contains some sections that beginners may find difficult to understand. Let’s take a look at them one by one.

※ Shimano spool compatibility table – Yunseongjogu

※ Shimano spool compatibility table – Shimano, Japan


There is no significant difference in the compatibility chart of Shimano spools between the one on the domestic website of Yunsungjogu and the one on the Japanese website of Shimano, but in my personal opinion, I think it would have been better if Yunsungjogu had a more detailed translation and supplementary explanation for domestic users rather than a machine translation.

Then, from now on, we will look at the spool compatibility table on the Yunseongjogu website. First, if you look at the method for viewing the compatibility table, you can see the expression ‘frame’ and the term ‘line winding type.’

One of the reasons I said that Yun Seong-jo’s compatibility table is at the machine translation level is because it uses the expression “teul” (frame). In Korea, we use the word “square” or “nemo” (square), not the expression “teul” (frame). This is the result of translating the Japanese word “waku” (frame).

Well, this isn’t that important, so let’s stop here. The most important thing to remember is that all models within the square or frame are compatible.

Next, something that is difficult for beginners to understand is  the line winding type, which refers to the shape of the spool taper.

Let’s take a closer look at the 14 Stella as an example. First, if you look closely at the spool compatibility chart, you’ll notice that the square borders are colored differently. This has no significant meaning and is simply used to distinguish the models.

As we have seen above, all models within the square are compatible. For example, the spool of the 14 Stella 1000PGS can be used on the C2000S. This also means that the spool of the C2000S can be installed on the 1000PGS.


Next, looking at the 14 Stella, you can see four squares on the side. The number of squares varies by model, from two to four, but these squares represent the entire lineup of the corresponding general-purpose model. Therefore, the 14 Stella can be understood as the entire lineup of general-purpose models within the four squares.

Below, there is a red box with the words ‘Yumeya (夢屋):○○’ written on it. This indicates a Yumeya (夢屋) product that can be installed. If the numbers in the ○○ section are the same, it means it is compatible. However, it would be good to note that the Yunseongjogu website does not link to Yumeya products, and only the Japanese Shimano website links.

Next, if you look at the bottom of the square, you can see that there are arrows on both sides (↔), on one side only (→), and in some cases, there are no arrows at all.  The arrows indicate the compatibility of spools of different models and years, for example, the 4000HG spool of the 14 Stella is compatible with the 4000 of the 10 Stella and 07 Stella.

And in the case below without an arrow, it means that it is not compatible. In other words, the spool that fits the 2000 of the 10 Stella cannot be mounted on the 2000 reel of the 07 Stella.

Lastly, when you hover your cursor over ※, the window that appears cannot be captured and cannot be explained in a picture, but it is listed as a compatible model on the compatibility table, but it clearly states that you must change the drag knob to use it, so you must check this before purchasing the spool.